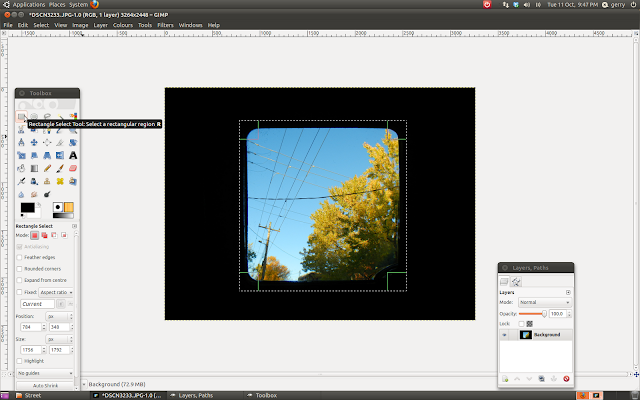
A few months ago Windows fried on me and I couldn't find my Windows XP CD. I happened to have a Ubuntu 10.04 CD lying around and since I had back ups of all my files, I think, I formatted and started a new software adventure.
Now I have my Photoshop Elements CD and I could run it with a special plug in inside this Linux software but I had to give GIMP a shot.
The great thing about GIMP, and Ubuntu for that matter, is that it's free. Not only that, but the software is completely vector graphics capable compared to the affordable Elements version of Photoshop and I'll say it again, it's free!
I've been through this process before 15 years ago when I switched from my first photo retouch program (Corel Draw) to Photoshop. I have found that the greatest challenge is to find what is what from the new software compared to the old. This is the exact same experience but it is a lot less painful. There are a lot of similarities between both of them.
I am no software expert but I will share with you what I found out through trial and error and hopefully avoid you the trouble of some frustrating moments as we navigate the waves of change.
The Basics
The first thing you notice is that the toolboxes and the image window are all separate. Where Photoshop is one window with opened image files in them, Gimp opens each image as a Gimp window itself. This means that each image can be used with the file, edit, etc... features within it. The toolbox will be effective to the image sitting on top.
Some of the immediate things you'll need to know in order to survive the transition quickly are as follows:
- Where most controls in PS use ALT to reverse or select like the clone tool, Gimp uses CRTL
- Pasted selections do not become layers automatically, you have to right click in the layer tool box and click on "new layer" before you edit it. Until then it is a "floating selection".
- The font selection sucks big time. You'll have to download a more complete font folder and a font viewer because Gimp as no preview features for fonts. Thankfully there's a lot out there and it's free. Just Google it.
- Putting text into an image will happen in a text box separately. The font size is always small so you probably won't see it. The font size is controlled in the toolbox. Just make it bigger to see it appear.
- There is no "deselect", instead it is called "none" in the select menu.
- When an object or layer is selected with the pointer tool, you can't just resize it, move it or rotate it. There is a separate tool for each of these operations in the toolbox. (Scale, Distort, rotate, etc...)
- Making lines is stupid simple. With any brush, click once at your starting point, hold the SHIFT key, drag the cursor to where you want it and click. Straight line every time. From that point on, every time you hit the SHIFT key it will be in line mode until you go to another tool.
- All the image adjustment features are under "Colours". There's a great white balance correction auto mode in there.
- Adjusting brush size is done in the bottom half of the toolbox under "Scale". The default setting is 1.
- To flatten layers you'll have to go to "Image" where you will find the "flatten image" feature.
- If the layer toolbox vanishes on you, just use CTRL+L and it will re-appear.
That's it for now. I'll have more as I work with it. Until then if you have any special request for me to look into Gimp, just leave me a comment.
Take care
Gerry :)
-


