Thursday, October 20, 2011

Making old photos look good, how to do the Orton effect

This image was processed after the film sat in the fridge for 15 years
Many of us have old pictures that bring back nice memories but the end result was not that great. It could be that the original equipment was not to par or that age has taken its toll on the image.

One cool way to bring back some zest to old photos and making them look good is the Orton effect. This is a technique that involved mixing a very sharp and bright copy with another one that is very blurry and dark of the same image. It was done in the dark room but now reproducing the effect with image editing software is a breeze.

This works with both Photoshop and GIMP.


Step one: Open the image, sharpen it a bit and then go to layers and duplicate the background layer.


Step two: Change the top layer's mode from "normal" to "screen".


Step three: Merge down both layers.


Step four: Go to layers and duplicate the background layer again.


Step five: Go to filters and open the Gaussian Blur tool. This is the tricky part. You need to blur the layer so you can barely see the details in the image. You might want to experiment with that step a few times to get the end result to your taste.


Step six: Change the top layer's mode to "multiply". You can also adjust the intensity of the effect by reducing the opacity of this layer.


Step seven: Flatten Image and you are done.

You can also play with the saturation and sharpen the original image before you start. Save your work as a separate file and compare with the original, you'll be amazed. There are other ways to make old pictures look good, this is a very simple one. The Orton Effect technique can also be used with good pictures, bland ones and even black and white images.

For more examples of what can be done you can check my photoblog here (The last 2 got that treatment) and here.

Thanks for watching.

Gerry :)

Tuesday, October 11, 2011

Cropping your TTV or Through The Viewfinder pictures


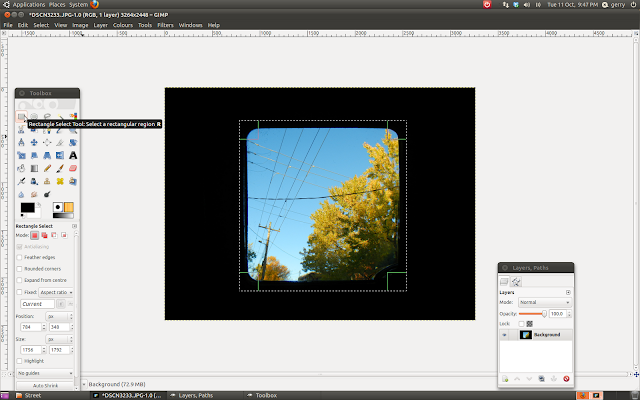
One of the interesting style of photography is to take pictures through the viewfinder of older cameras or TTV. Once you have taken your picture you will have to crop it in order to get that 6X6 look. Here's how to do it.


First open your image in your graphic edit program like Gimp or Photoshop.If you picture is not level, simply do select/all, use the select tool in Photoshop to rotate the image until it is level. In Gimp you will select all as well, click on the rotation tool, click on the image and rotate it with the cursor until you are satisfied. You'll then have to click on "rotate" in the dialog box in order for the changes to be set.

Second, use the square select tool and make a square box around the actual image.


Third, crop. In Photoshop go to: image/crop. In Gimp go to: image/crop to selection.


Lastly you might want to flip the image since most viewfinders show a reverse image of the original. You don't have to but if you want here's how to do it. In Photoshop go to: Image/rotate/flip horizontally. In Gimp go to: image/transform/flip horizontally.

That's it you're done.

Have fun.

Gerry :)